Making Connections
Last week, we went over some of the ways that layers can interact with each other in After Effects, using track mattes and transfer modes. This week’s lesson has a similar theme, as we’ll be combining, affecting, and linking layers in new ways. These techniques will be essential as we begin to work on actual character animation, but they are also extremely helpful when creating motion graphics and text animation.
Adjustment Layers
Adjustment layers are a very cool feature found in After Effects and some video and photo editing programs. Basically, an adjustment layer is a blank layer in the timeline. Any effects that you add to an adjustment layer will be applied to the layers beneath it. Any layers above the adjustment layer will be unaffected. This allows you to quickly apply effects to an entire scene. If, for example, you decide you want your composition to be in black and white, you can add an adjustment layer and apply the “tint” effect to it. Without the adjustment layer, you would have to go to each layer individually and apply the effect.
To create one, go the the Layer drop-down menu at the top of the page and go to New>Adjustment Layer. An adjustment layer the size of your current composition will be created and placed in the timeline. After Effects also lets you modify adjustment layers in interesting ways by using masks. For example, you can use a circular subtract mask on an adjustment layer to create a simple vignette. Note that while adjustment layers have transform properties, modifying those properties does not affect the layers below – only effects are applied.
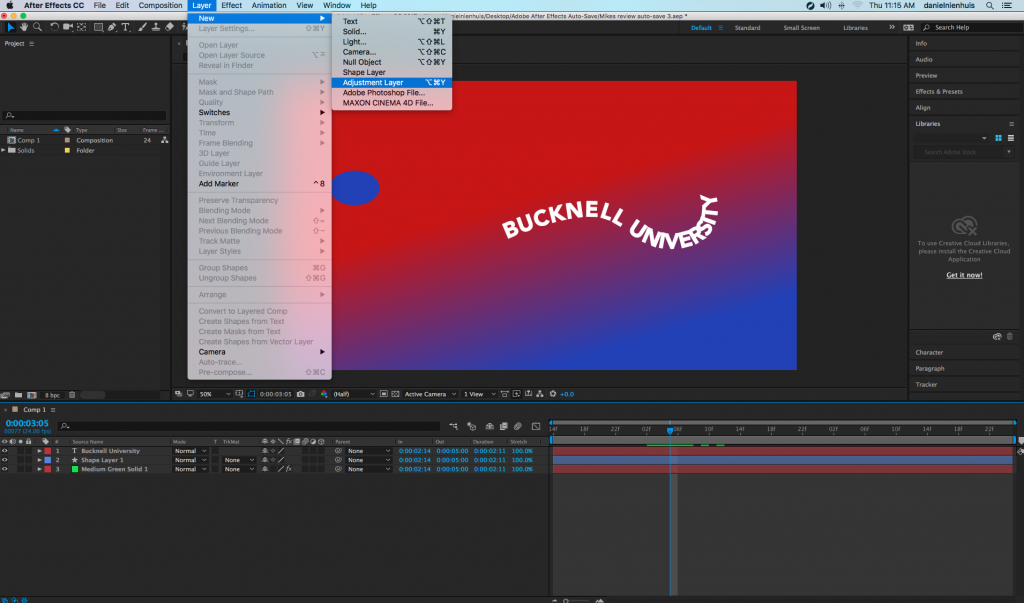
If you do want to apply things like scale and rotation using an adjustment layer, it is possible, however. In the “Distort” section of the effects, there is one called “Transform.” This is a set of the usual transform properties – anchor point, position, scale, rotation, and opacity – that can be applied as an effect. If you add the transform effect to an adjustment layer, that effect will be applied to the layers below.
Pre-composing
When you create a new composition in After Effects, it appears in the project panel along with the rest of your media – that’s because compositions essentially are pieces of media, just like stills and video files. This means that you can drag one composition into another and then add effects, mask it, or manipulate its transform properties. In fact, it’s quite common to have compositions within compositions within compositions for a complex project.
In addition to dragging one composition into another, you can choose certain layers within an open composition and make a new composition out of them – without ever leaving the timeline you are working in. After Effects calls this “pre-composing.”
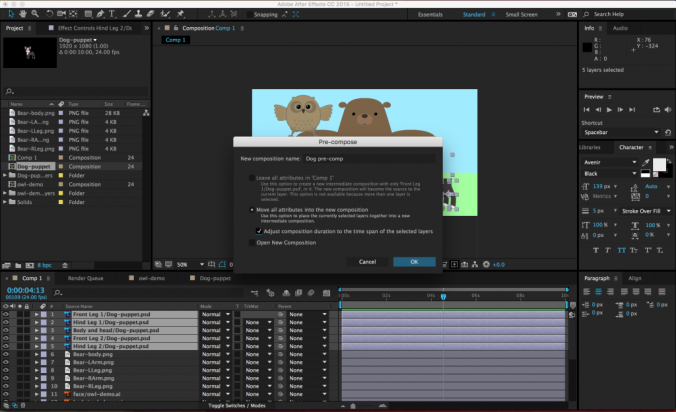
To pre-compose media in the timeline, select the desired layers (command-click to choose more than one layer), right-click and select Pre-Compose…. A menu will appear with options for re-naming the new composition (probably a good idea), leaving or moving the “attributes” of the layers (choose to move them), adjusting the length of the new composition (choose to do this), and opening the new composition (not necessary).
Once the layers have been pre-composed, the new composition will appear in the old composition as a single layer. It will also show up as a new composition in the list of project media. If you double-click on the pre-composition, it will open up in the timeline and preview windows. Pre-composing media is a great way to clean up a chaotic composition (sometimes you just have way too many layers in there), as well as a simple method of applying effects and transformations to multiple layers at once.
Parenting
Parenting is a unique feature in After Effects and it’s incredibly powerful. When you parent one layer to another, the “child” layer will be affected by the scale, position, and rotation of the “parent” layer. Parenting does not affect opacity, effects, or masks.
To parent a layer, you use the Parent section of the composition panel. You can either choose the parent layer from the drop-down menu or use the “pick whip” selector next to it (it looks like a little swirl). A parent layer can have multiple child layers connected to it – and a child layer can have its own child layers – but a child layer cannot have multiple parent layers. That probably sounds confusing, but it should quickly make sense once you start playing with it.
Parenting has some very basic and commonplace applications for things like lower thirds and title design. For example, you could parent a text layer to a solid layer, then animate the solid layer sliding into the frame. The text will keep its position relative to the solid and slide in with it. This keeps your animation consistent and means that you only need to keyframe properties on one layer instead of two.
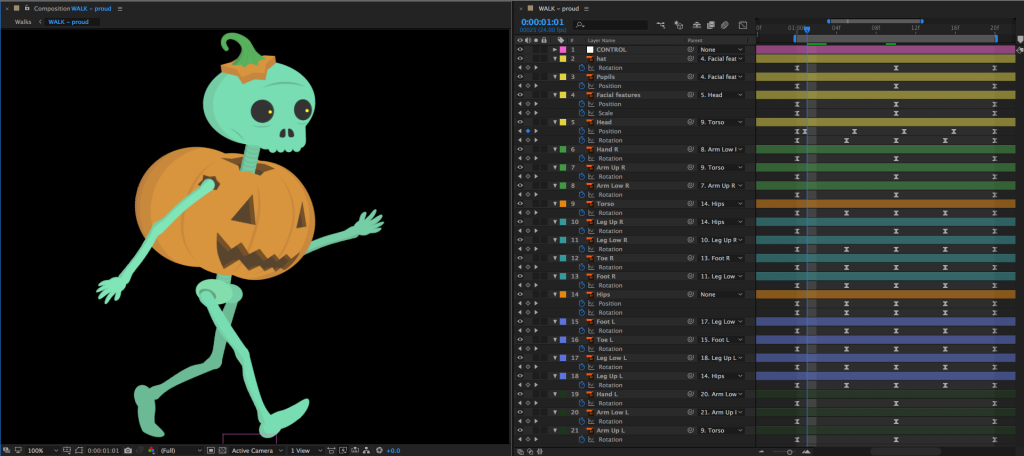
Under the Layer drop-down menu, you can also create a “Null” object (Layer>New>Null Object). Null objects don’t appear to do anything at first, but they are very useful as parent layers. You can parent several child layers to a null and then affect them all simultaneously.
Project 6: Lower Thirds
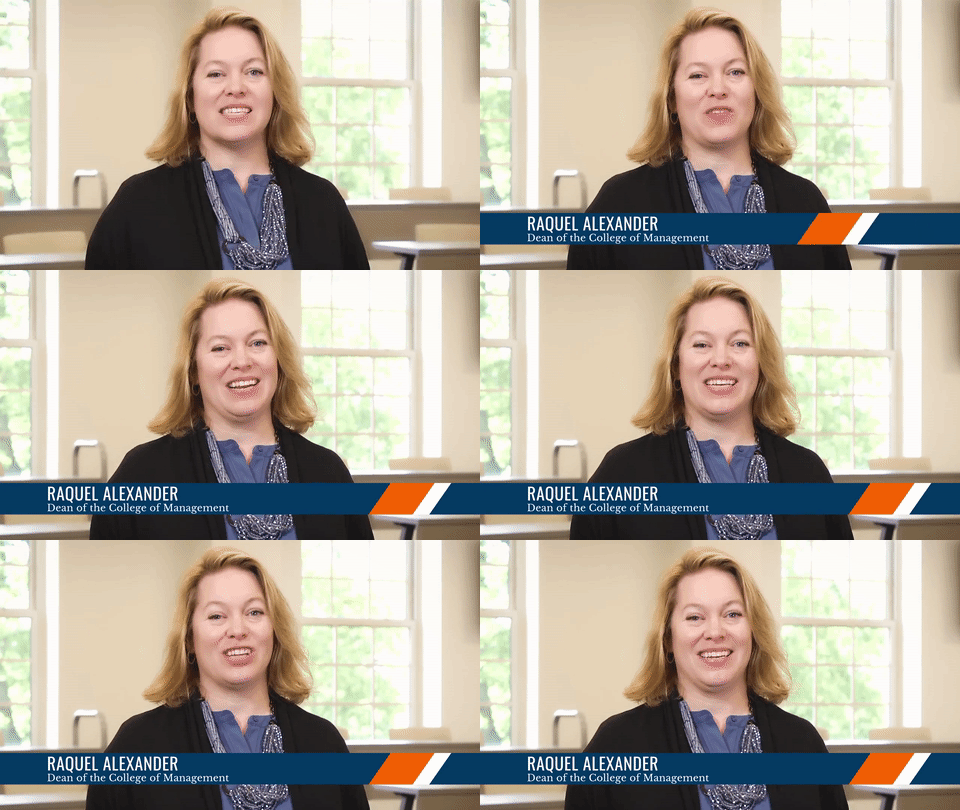
One thing that After Effects is often used for is the creation of “lower third” graphics. A lower third is a graphic (usually located in the bottom third of the frame) that contains text information about the subject of the video. Lower thirds are most often used in interview and documentary footage where the viewer needs to know the name and/or other information of whoever is on screen.
This week, you’ll be creating a lower third graphic. Download one of the videos above and create a lower third for that person. Here are the parameters:
- The lower third should be on screen for between five and ten seconds.
- The graphic should animate on to and off of the screen. This can be done using opacity, movement, or anything else you like.
- There should be two lines of text: one of your subject’s name and one of their job or title. Make something up!
This is a good opportunity to practice and combine the various skills and techniques we’ve been going over – track mattes, effects, easing keyframes, etc.. If you would like some additional generic footage to use, here are some slow motion clips. You are also free to find footage or still images on your own. Render the video at 1920 x 1080 resolution using the H.264 codec and send me a download link!
